

Monday, February 24, 2014
Little Harlequin Dresser
I finally got something FREE! Yeah! It was under off of CL. I called the guy and said I was coming over. I was a tad disappointed because the desk in the picture looked, well, normal size. In person it was miniature! So maybe I can make it for a little girl, I thought. (I mean cmon, it was free). Or maybe a little person may want it. Whatever. Did I mention it was free??


Hmmmm,,,now what to do with it. I figured pink since it would most likely be for a girl. Then some white. But everyone does pink and white. Hey wait, I just got a new gray color from Martha Stewart paint that HD is discontinuing. I bought a gallon (12 bucks maybe?), divided it into 4 quart containers and had the paint guy tint each one a different color! Genius, I know right??
So pink and gray it is.
It needed a lot of filler. This baby was pretty dinged up.


I thought maybe I could refinish the top, but with the gray and pink combo, I didnt think it would look that great.
Plus this wood on top isnt all that great anyway.
So for the pink I used Behr Geranium mixed
with Bright white. What you see in the cup is
all I mixed for this desk. Thats Plaster of Paris in
the other cup. Thats all I used for my chalk paint for
the pink. Step by step for the gray is below.

So for the gray chalk paint. I use 2:1 ratio. (2 paint , 1 PP)
These little plastic cups are great for measuring. I stir the PP
with a little hot water until the lumps disappear.


I dont dump it in right away.
I add a little bit of paint to the mixture and stir. Kinda like tempering eggs!

my whisk (Big Lots) to mix well.
It works great.
Mark my container and off we go!

I know there are a ton of ways to do this out in blogland. But I have used this over and over again
with no issues. The hot water is really the key to break up the lumps and grit. I have ASCP as well. And yes it is great paint. Is mine just as good??? Well, yes and no. I will say hers is easier, by a tad. But the finished result is almost identical. At least to me. If you are on a budget, then I like my way.
The below picture
shows what the first coat looks like. Nice and smooth and no lumps.

Ok. So not wanting to be left out, I jumped on the harlequin train for my desk top. Lemme just say after getting started, I wished I would have let that train leave the depot without me! Holy Hannah, what was I thinking???? Researching the stupid pattern took me about an hour. I did that Silver Spoon Harlequin pattern calculator thing. Put in my dimensions and I got 3 rows, 15 columns of 6"X 3" diamonds.
No problemo, right? Are you counting???? Thats 45 diamonds!


draw all this out. I was shocked when all the lines actually lined up!

Lord have mercy. See that roll of tape? It was almost full when I started. In retrospect, I probably should have painted the top pink, being that its lighter. But I knew I didnt have enough. I had to paint the pink in two parts because of the tape overlapping other diamonds.


Ok. So here is the little princess all done and waxed.

In hind sight, I should have filled in the pull holes and gotten new hardware. These pulls are 4 1/4". Not a standard size.

I wiped on a metallic glaze haphazardly to give it a
little shimmer and antique-y sort of look.


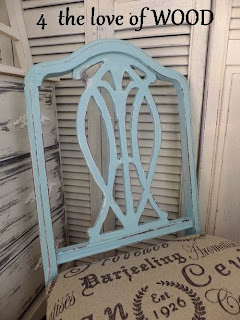
Im having a very difficult time finding a chair to go with this desk. The opening is only
19" high. I need a "mini-me" chair!


I spray painted the handles a glossy white. Not really diggin them, but
a custom order of this size would be a little pricey.
Note to self,,,"fill in the holes before painting!!"


Would u guys mind leaving a comment about the knobs?? Yay or nay? Does it look
too funky with the glass knobs on the middle drawer? Should the original handle go
back on??
CHARITY RESULTS SMELLY WOOD
Last weeks Charity Auction was a huge success. Thank you to everyone who came out
to attend the event. The evening brought over $4000 in donations for the Langley Christmas Bureau.

My chair went up for live auction and made $250 on its own.
Many of you have been asking how you can get involved next year. If you want to create a chair,
get involved with some advertising, or be helpful in some other way simply email The Passionate
Home thepassionatehome@telus.net
********************************************
I painted a chair in an aqua blue and upholstered it with this teahouse script fabric.


***********************************************
Lastly for today I want to share some helpful information for a
question I get asked about often ...
I have an old dresser that smells to high
heaven of old wood. What do you suggest I
use to get the old wood smell off the piece?
My hubby suggested I use bleach water. I
thought to use Simple Green or Murphys Oil
soap. Your help is appreciated.
heaven of old wood. What do you suggest I
use to get the old wood smell off the piece?
My hubby suggested I use bleach water. I
thought to use Simple Green or Murphys Oil
soap. Your help is appreciated.
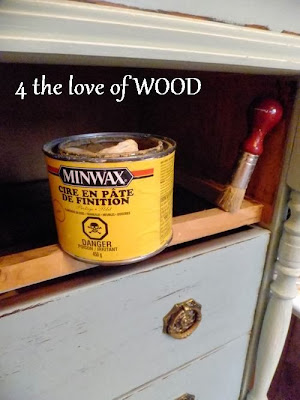
Wood absorbs odors so washing the surface doesnt usually help.
The best way to combat the smell is to expose the wood to the
sunshine. Take the drawers out and let it sun bath for a couple of days.
sunshine. Take the drawers out and let it sun bath for a couple of days.
If the sun isnt shining these days in your neck of the woods,
waxing (sealing it in) is another option. This includes waxing all
the interior surfaces.
waxing (sealing it in) is another option. This includes waxing all
the interior surfaces.
Just brush the wax on when you do inside and let it dry. No
removing the excess or buffing.
removing the excess or buffing.
Having a pretty smelling soap in each drawer or taping a fabric
softener to the drawer back can help mask the smell if you want to
wait for the sun.
********************************************
softener to the drawer back can help mask the smell if you want to
wait for the sun.
********************************************
Sunday, February 23, 2014
Printer Cabinet Finally done! RH knock off!
So if you read the post below this one, you'll have seen that I've been working
on this printer cabinet like the one being sold by Restoration Hardware.

Jen Woodhouse over at House of Wood, had Ana White draw up some plans for her after seeing
this cabinet. I liked Jen's so much, and got such inspiration from her, that I decided I
wanted one too! My husband was kind enough to humor me and lend a hand.
Here is Jen's:

Here is my finished version:

There is no sense in me reinventing the wheel, so, for the actual plans, go to Ana's site.
For the actual step-by-step, go to Jens site.
Both of these women are absolutely amazing!
I made a few changes and will touch on those. I also made mistakes!
If I had to build another one, it would be easier!
So please, if you plan on doing one of these, follow closely! I will save your sanity!
Wood: I wanted something different. I didn't want to use pine or douglas fir. I walked around
the lumber yard and found some rustic alder that I liked. But,,,,,They don't make 2X2's, 1X2's and 1X3's.in alder. No problem. If you have a table saw
Read more »A BARN GEM white washed dove grey table
The neighbors had a yard sale early this month,
and of course we scurried over to take a peek.


This little guy musta been hidden in their barn for a
bit of time, but was now time for a new home


..... AND A NEW LIFE!


The only products I used to achieve this look were
primer, stain, and a finish wax.

primer, stain, and a finish wax.
If anyone would like to
see a post on how I accomplished it let me know
below and Ill be happy to write a tutorial
with photos I took during the project.
UPDATE: tutorial can be found here:
*JUST PRIMER AND SOME WAX*
Joining the ladys at:

UPDATE: tutorial can be found here:
*JUST PRIMER AND SOME WAX*
Joining the ladys at:
Saturday, February 22, 2014
Choosing Woodworking Tools That Are Right For You

If youve developed the itch to work with wood, then youre going to need some tools.
But what kind of woodworking tools and how many?
The answer to this will depend largely on things such as your budget, your style of woodworking, and the type of wood youll be working with.
The style of woodworking that you do can be affected by such things as the space in which you have to work or where you live. For example you may simply not have enough available space to have all the latest or biggest power tools, or you may live in an environment where the noise from power woodworking tools may be prohibited. If this is the case, your style may be one of strictly working with hand woodworking tools.
In the end however, if youre like most woodworkers, throughout the years youll end up with a combination of woodworking tools from the large and powerful to those original hand tools that you grew up on when you started working with wood back in your apartment.
Another influencing factor when it comes to choosing the right woodworking tools for yourself is the style of furniture that you intend on building. One style of furniture will more than likely require few different types of tools over another style. This is why its always a good idea to get yourself a good set of plans for the type of project youre considering.
Today the amount of woodworking tools that you can buy is limited only by your ability to be able to afford to buy them.
But before you run off and bust the bank buying woodworking tools, consider that woodworking isnt always about having the best tools. There is something to be said for developing your skills, your imagination, and problem solving without always having the best power tool to overcome every issue.
Remember there are just about as many ways to accomplish something in woodworking as there are tools on the market. In fact, most of the time when you think youre up against a limitation caused by your lack of tools... its your imagination and self skills that will come up with a workable solution if you just re-think the situation.
But, when the time comes and you begin thinking seriously about acquiring some additional woodworking tools, dont be so quick as to rush out and get the latest shiny new object. Take the time to look over some reviews from one of the professional woodworking magazines that are available and see how the various models have been graded out by the people who have actually used the tools.
Friday, February 21, 2014
Bucket List
Project bucket lists are a subject that gets broached by woodworkers and bloggers from time to time. It is a good exercise to go through and though Ive started a post about my list several different times, I havent published any of those posts because they always seem, well, cliché.
But I was paging through my sketchbook / journal the other day and came across the last bucket list version Id written a couple years ago and I was amused to see how I felt about the things I had on the list. I try to limit the list to ten entries, only for my sanitys sake if nothing else, and there were things on that list I had accomplished and some things that had changed.
That was enough to get me off the cliche train and writing another post, this one may even get published.

First the thing I was happy about was scratching a couple things off the list. A traditional tool chest has been on that list for a long time, it was good to mark that done. I also could remove 17th Century carved bible box from the list, several times over.
.JPG)
The other one Im scratching off the list is a spice chest. I was a little hesitant because the one Im working on is still in process, but Ive finally worked my way through the design block I was having with the foot section and Im ready to begin moving forward again, a soon as the weather warms a little and I get another carved box finished I promised for a benefit.
Life is full of roadblocks, but I guess that would be one reason why youd write a thing like a bucket list.
In the end the things that amazed me more than what I had finished was the things that had changed on my personal priority list. Ive changed and Ive grown as a woodworker over the last couple years, and if Im honest I just dont have a passion to build "that piece" any longer. If thats the case then it doesnt really belong on the list.
Casualties of passion included a Queen Anne Highboy, and a Federal Card Table. I think these made it on the list to start with because they are the kind of "high end" builds that you are supposed to want to build. Im just not up for falling into that keeping up with the Joness kind of stuff anymore.
Removing some things meant adding some things on and I put some real thought into the new list and why I should want to build whats there. I limited my self to a selection of ten, but Im listing them in no specific order. Without making you wait further, heres the Oldwolf Workshop Woodworking Bucket List:
10. A Joined Stool - Id really like to do this right and split the stock from a the log. Chair making seems as magical to me as slight of hand seems to a seven year old. This project seems like a gateway into that world.
9. A Pembroke Table with Queen Anne Cabriolet Legs and Ball and Claw Feet - Pretty specific I know but this project remain because it would give me work on several different woodworking techniques I want to challenge myself with, including engineering drop leaves and rule joints, making wooden hinges for the legs to swing out, making cabriolet legs, and carving ball and claw feet. Thats a lot of sawdusty goodness packed into one bite sized crunch.
8. A William and Mary Tea Table - I love William and Mary furniture and Ive always wanted a to build a tea table. This was the project that just couldnt come off the list.
7. Campaign Chest with a Secretary Top Drawer - Yes, just like the one Chris Schwarz built for Popular Woodworking. Ive loved these pieces for years and something like this has always been on my list.
6. A Nautical Desk - Ive also seen these listed as a ship captains desk. They are wonderful takes on campaign furniture and a great example of cleverly fitting a ton of storage into a small space. Lots of places to fit and find secret drawers and compartments as well.
5. Windsor Chair or better Rocker - Again, chair making seems magical to me and the light weight but strong Windsor chair appears to be the pinnacle of those endeavors. How could you not strive to make one. I wont try and tackle it for many, many years. I have a lot of things already in front of me that have to take precedence, but thats what a bucket list is for.
4. A 17th Century Carved, Joined Chest - Again, I really want to do this right and get this stock right from the log, but I think it should come as no surprise to anyone who reads my words regularly that this is on here.
3. A Queen Anne Secretary - A while ago I bought a book called "English Furniture 1550 - 1760" by Geoffrey Wills. Ill admit I havent read much of it but I pick it up and page through the pictures quite often, but the first time I did that I came across a piece I fell in love with and knew it belonged on this list.

2. A Kubbestol - This is a chair dug out from a solid log. Its a piece of folk furniture that, as I understand it, hails from Norway, Sweden and Northern Europe. They are often carved on almost all of their surfaces. I saw one in a museum a while back and just the sheer effort and skill that went into its creation and the uniqueness in its spirit told me I have to build one. I havent worked out the logistics of it yet, but I think about this piece often.

1. A 17th Century Joined Table - This table is part of the Chipstone Collection and I got to see it in person at the Milwaukee Museum of Art about a year ago and it is just a great piece. I was captivated in a heartbeat and I must have snapped fifty pictures of it to try and capture its essence so I could try and replicate it later.

There you have it, and now that Ive gotten this little bit of cliche out of my system, I can only sit back and hope it warms up a little bit here in Wisconsin so I can waddle my way back out to the shop and you can read about real sawdust making again.
Ratione et Passionis
Oldwolf
Read More..
But I was paging through my sketchbook / journal the other day and came across the last bucket list version Id written a couple years ago and I was amused to see how I felt about the things I had on the list. I try to limit the list to ten entries, only for my sanitys sake if nothing else, and there were things on that list I had accomplished and some things that had changed.
That was enough to get me off the cliche train and writing another post, this one may even get published.
First the thing I was happy about was scratching a couple things off the list. A traditional tool chest has been on that list for a long time, it was good to mark that done. I also could remove 17th Century carved bible box from the list, several times over.
The other one Im scratching off the list is a spice chest. I was a little hesitant because the one Im working on is still in process, but Ive finally worked my way through the design block I was having with the foot section and Im ready to begin moving forward again, a soon as the weather warms a little and I get another carved box finished I promised for a benefit.
Life is full of roadblocks, but I guess that would be one reason why youd write a thing like a bucket list.
In the end the things that amazed me more than what I had finished was the things that had changed on my personal priority list. Ive changed and Ive grown as a woodworker over the last couple years, and if Im honest I just dont have a passion to build "that piece" any longer. If thats the case then it doesnt really belong on the list.
Casualties of passion included a Queen Anne Highboy, and a Federal Card Table. I think these made it on the list to start with because they are the kind of "high end" builds that you are supposed to want to build. Im just not up for falling into that keeping up with the Joness kind of stuff anymore.
Removing some things meant adding some things on and I put some real thought into the new list and why I should want to build whats there. I limited my self to a selection of ten, but Im listing them in no specific order. Without making you wait further, heres the Oldwolf Workshop Woodworking Bucket List:
10. A Joined Stool - Id really like to do this right and split the stock from a the log. Chair making seems as magical to me as slight of hand seems to a seven year old. This project seems like a gateway into that world.
9. A Pembroke Table with Queen Anne Cabriolet Legs and Ball and Claw Feet - Pretty specific I know but this project remain because it would give me work on several different woodworking techniques I want to challenge myself with, including engineering drop leaves and rule joints, making wooden hinges for the legs to swing out, making cabriolet legs, and carving ball and claw feet. Thats a lot of sawdusty goodness packed into one bite sized crunch.
8. A William and Mary Tea Table - I love William and Mary furniture and Ive always wanted a to build a tea table. This was the project that just couldnt come off the list.
7. Campaign Chest with a Secretary Top Drawer - Yes, just like the one Chris Schwarz built for Popular Woodworking. Ive loved these pieces for years and something like this has always been on my list.
6. A Nautical Desk - Ive also seen these listed as a ship captains desk. They are wonderful takes on campaign furniture and a great example of cleverly fitting a ton of storage into a small space. Lots of places to fit and find secret drawers and compartments as well.
5. Windsor Chair or better Rocker - Again, chair making seems magical to me and the light weight but strong Windsor chair appears to be the pinnacle of those endeavors. How could you not strive to make one. I wont try and tackle it for many, many years. I have a lot of things already in front of me that have to take precedence, but thats what a bucket list is for.
4. A 17th Century Carved, Joined Chest - Again, I really want to do this right and get this stock right from the log, but I think it should come as no surprise to anyone who reads my words regularly that this is on here.
3. A Queen Anne Secretary - A while ago I bought a book called "English Furniture 1550 - 1760" by Geoffrey Wills. Ill admit I havent read much of it but I pick it up and page through the pictures quite often, but the first time I did that I came across a piece I fell in love with and knew it belonged on this list.
2. A Kubbestol - This is a chair dug out from a solid log. Its a piece of folk furniture that, as I understand it, hails from Norway, Sweden and Northern Europe. They are often carved on almost all of their surfaces. I saw one in a museum a while back and just the sheer effort and skill that went into its creation and the uniqueness in its spirit told me I have to build one. I havent worked out the logistics of it yet, but I think about this piece often.
1. A 17th Century Joined Table - This table is part of the Chipstone Collection and I got to see it in person at the Milwaukee Museum of Art about a year ago and it is just a great piece. I was captivated in a heartbeat and I must have snapped fifty pictures of it to try and capture its essence so I could try and replicate it later.
There you have it, and now that Ive gotten this little bit of cliche out of my system, I can only sit back and hope it warms up a little bit here in Wisconsin so I can waddle my way back out to the shop and you can read about real sawdust making again.
Ratione et Passionis
Oldwolf
Subscribe to:
Posts (Atom)