Social Icons

Pages

Wednesday, March 5, 2014

Make a wood doormat and make money

This project began as a germ of an idea. My wife took a picture of a rustic door mat she found that was made entirely out of sticks. I had never thought about wood doormats, so I looked online to find some precedent. Turns out, there are many.

Door mats are expensive!

But what caught my interest the most were the prices being charged: typically between $100 and $200 each.

I mulled it over a while to see if I could design something just as durable, yet easy and inexpensive to make. My first thought was to essentially make a miniature version of a deck. The problem here is that I didnt want to have to attach the individual planks with screws, which would look unpleasant. Plus, spacing the boards would be difficult: if they are even slightly askew, it would be blatantly apparent on such a small scale.

After many sketches, I finally came up with an elegant way to build this. It solves the problem of screwing in planks, and allows for expansion and contraction. But the best part: the board cost me $12. The only other supplies needed are two steel rods and 30 flat washers from the plumbing department. Total cost: $24. Ill bet you could sell these for over $100. If you use teak, you could double the price. Hey, why not try making some extra cash?


Read More..

How to Remove Old Finish From Furniture

By [http://ezinearticles.com/?expert=Kenneth_J_Ellis]Kenneth J Ellis
General Rules for Removing Old Finish
1. Do nothing that will harm the original surface unless the piece is to be painted.
2. If you plan to replace the old finish with a clear type, all old finish must be removed so the new will hold properly.
3. When removing old paint it is not only permissible but acceptable to most collectors that the marks of wear through the years, as well as traces of color from the old paint be allowed to remain so that they will show through the new finish. Traces of old paint add interest to the piece by their variations of color, and are evidence of age. Old paint however, should not be left on in thick patches or blotches.
4. For final cleaning, after using a remover, use a cabinet scraper or knife blade on joints, corners, and angles on flat surfaces. Use steel wool to clean out carvings, turnings, mouldings etc.
5. If the old finish is shellac, you dont need a paint and varnish remover. It can be taken off with denatured alcohol and steel wool.
Selecting Your Paint Remover
Commercial removers are solvents rather than corrosives. They act more slowly on older paints than on new, but they are the only materials that can be used safely. They attack the material such as linseed oils used in paint, or the resins in shellac, varnish, and lacquer. It wont injure a surface by burning it or leaving marks and wont be harmful to glue or raise the grain of the wood. They contain no water and may be used on veneered surfaces without causing the veneer to loosen. When used properly and washed off, solvent-type paint removers leave the surface clean. Dislodging layers of old paint or varnish isnt difficult, but patience, time, and-following the directions on the container are required.
How to Remove Old Finishes
Dislodging layers of old paint or varnish isnt difficult, but it takes patience, time, ans perseverance. Here are some basic directions for using paint remover.
1. Place the piece to be worked on over layers of old newspaper in good strong light, and if possible, with the top surface in a horizontal position. Avoid working in cold temperatures below 68 degrees F--cold slows down the action of removers.
2. Shake the remover thoroughly, pour a small amount into a small can and apply thickly with a full brush in one direction. Do not rebrush.
3. Let the remover stand for a period of from 10 to 20 minutes, or until the paint or varnish lifts.This is indicated by a crinkling of the surface. Do not let the remover dry. If it begins to dry, apply an additional coat and wait for it to act.
4. When the surface covering has lifted, remove it with a dull putty knife that has the corners rounded off. Remove the accumulation of remover and finish and wipe the knife on a piece of old newspaper.
5. Wipe off as much of the remaining finish as possible using burlap squares.
6. Scrub the surface with a small brush dipped in denatured alcohol.
7. Wipe off with several clean cloths.
8. Rub the surface with steel wool dipped in denatured alcohol.
9. Wipe with cloths dipped in alcohol. This not only cleans the traces of remover from the surface but neutralizes its further action. Follow by wiping with clean cloths dipped in turpentine or paint thinner.Then wipe with dry rags. This will remove any remaining wax or silicone polish that may have been used on the finish in the past. 10. Allow to dry thoroughly for at least 24 hours.
Removing Deeply Buried Paints
A deeply buried paint can be removed entirely or partially by a simple procedure. This is paint usually left after you have removed the previous cotes with remover or light scraping. Because its so simple its worth trying.
1. Apply a liberal coat of shellac with a brush and let it dry for at least 24 hours.
2. Use the remover as previously directed. All or part of the buried paint will come off with the shellac. Be sure all traces of the remover is gone and the surface is completely dry before applying a new finish.
"visit http://www.kewoodworking.com "
Article Source: [http://EzineArticles.com/?How-to-Remove-Old-Finish-From-Furniture&id=6687448] How to Remove Old Finish From Furniture
Read More..

The power of woodworking

Mere Minutes:


Wow! Look at all the WWMM projects Dan has made:


Mallet videos this week:
  • Drew Shorts mallet 
  • Brian Grellas mallet
  • John Heiszs mallet
  • Jon Peters mallet


Read More..

Tuesday, March 4, 2014

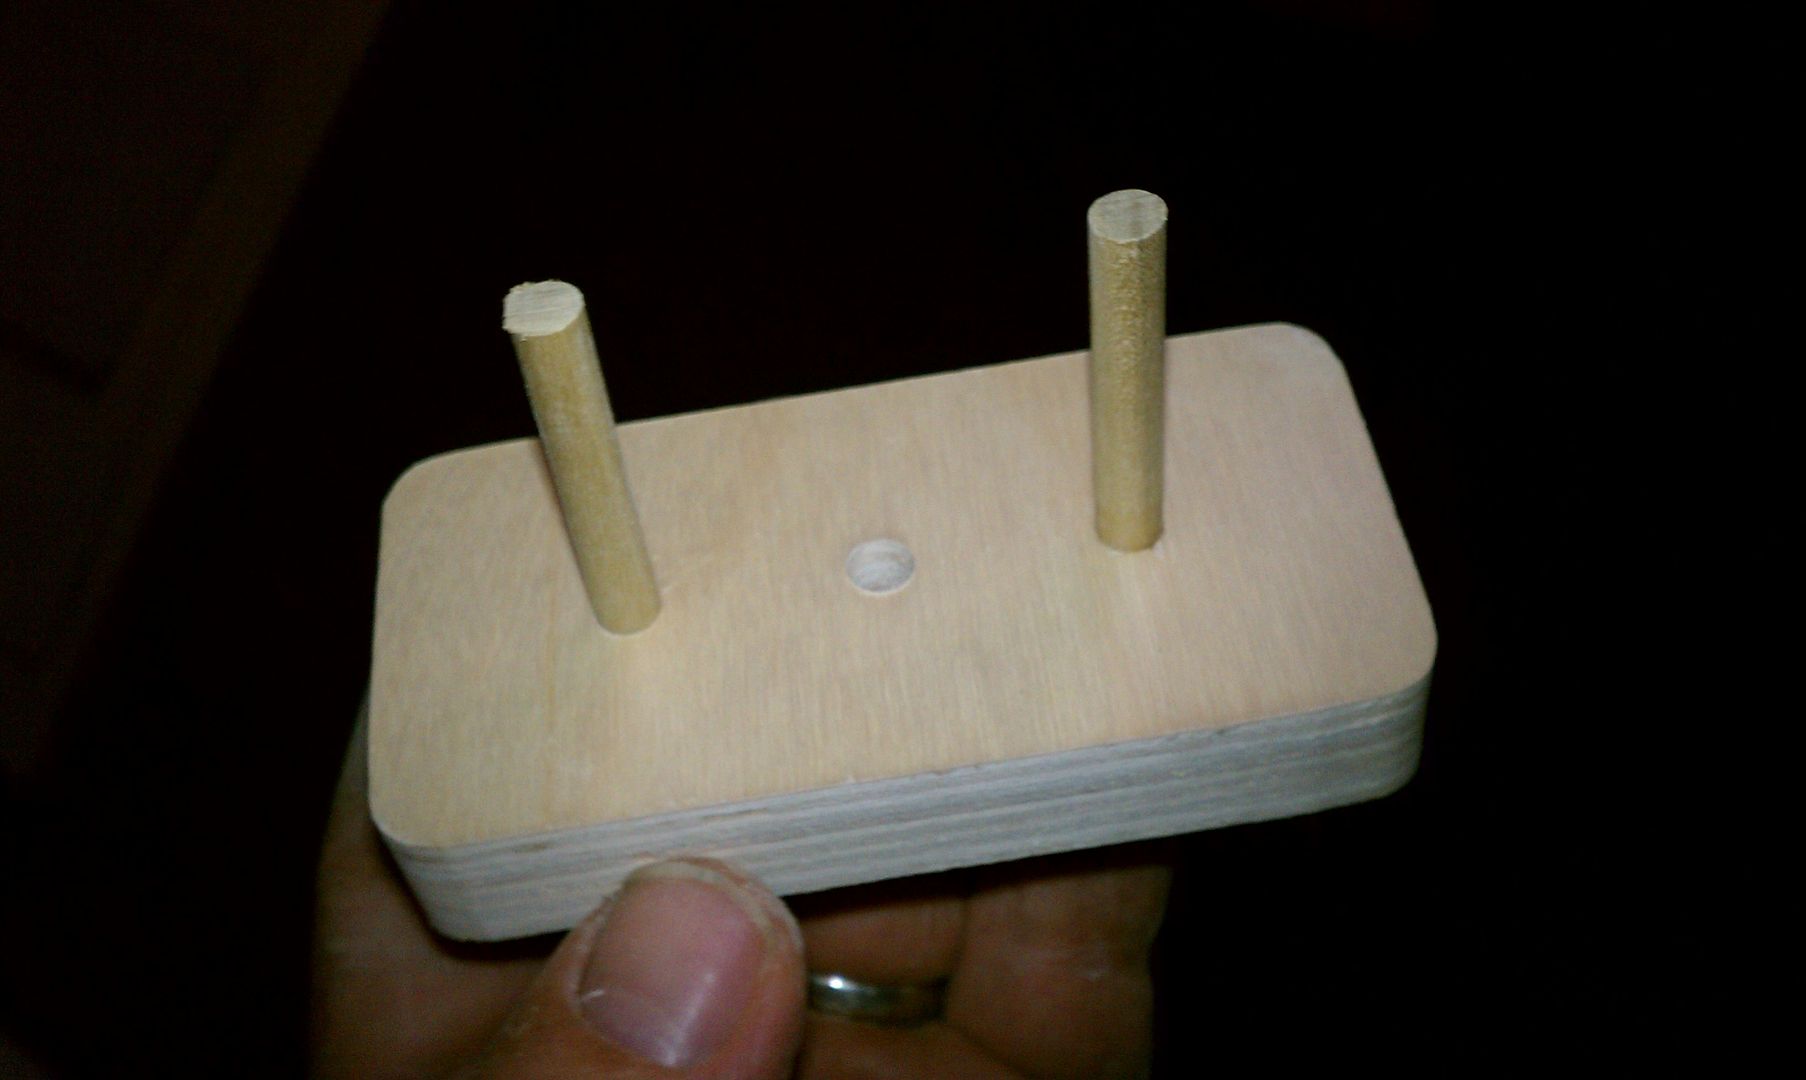
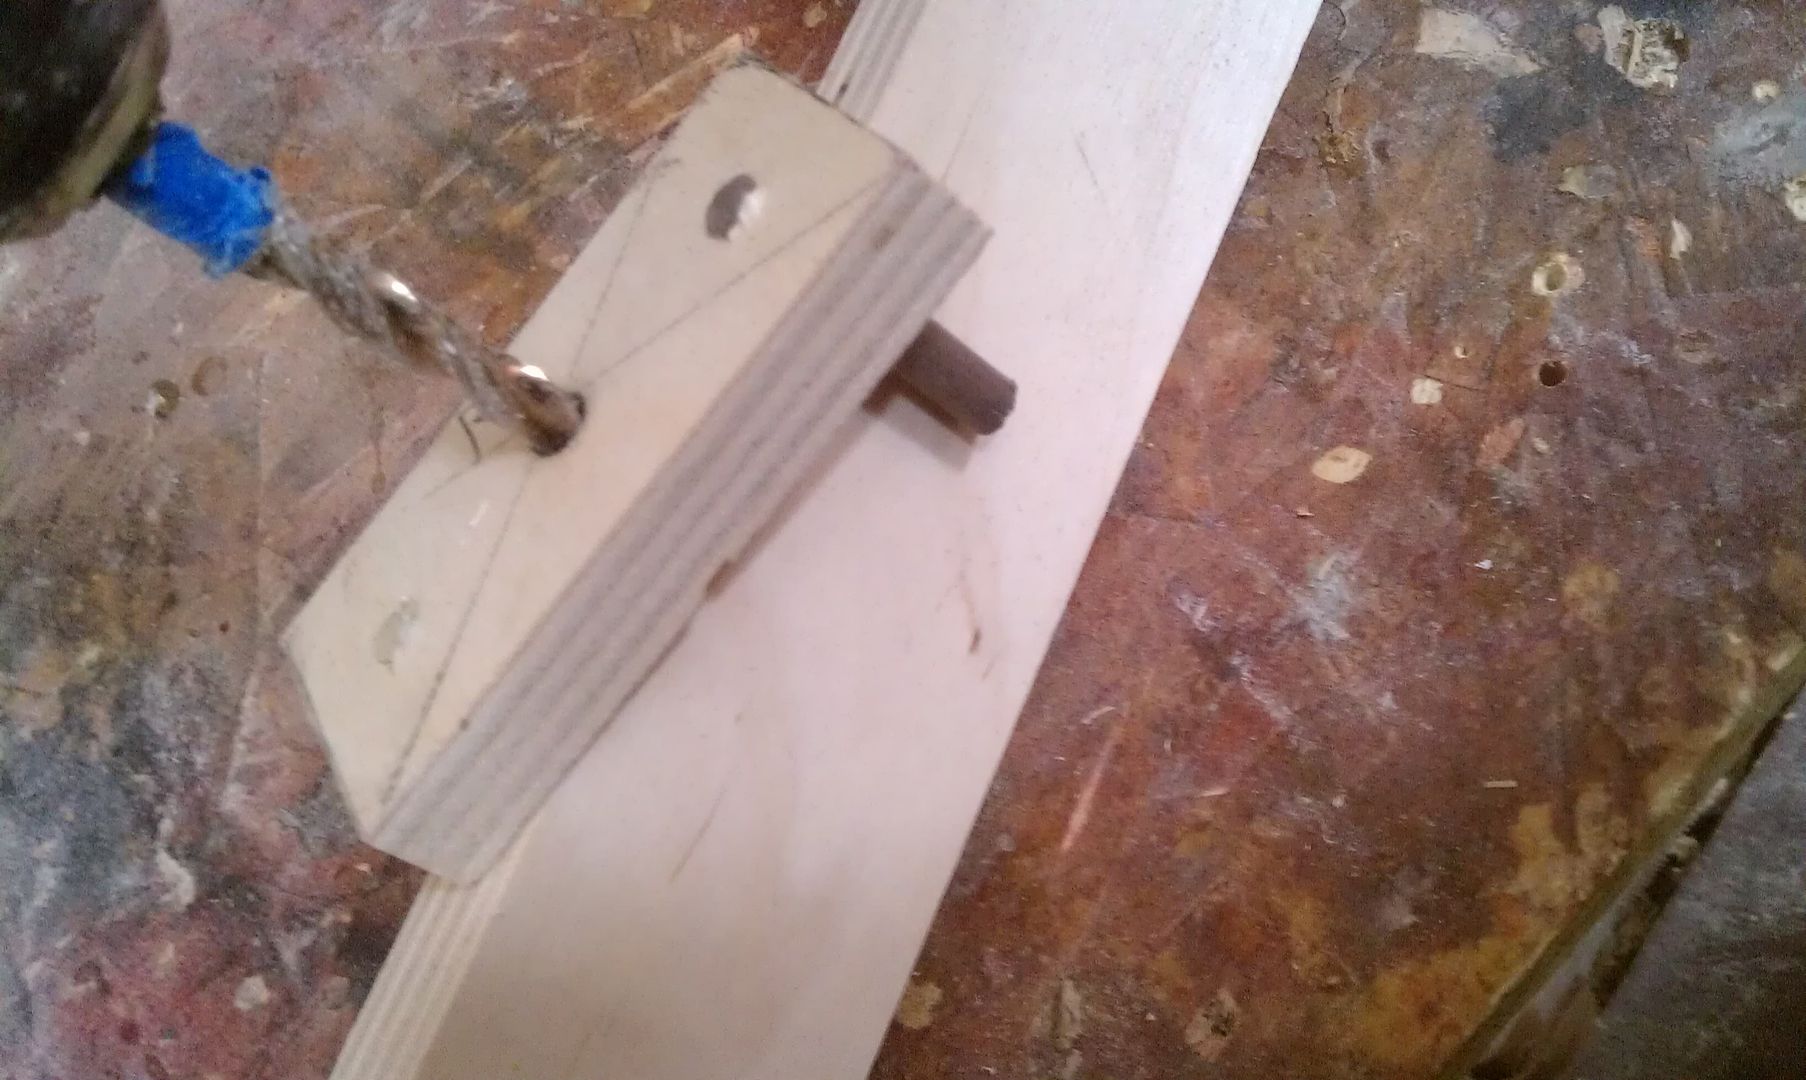
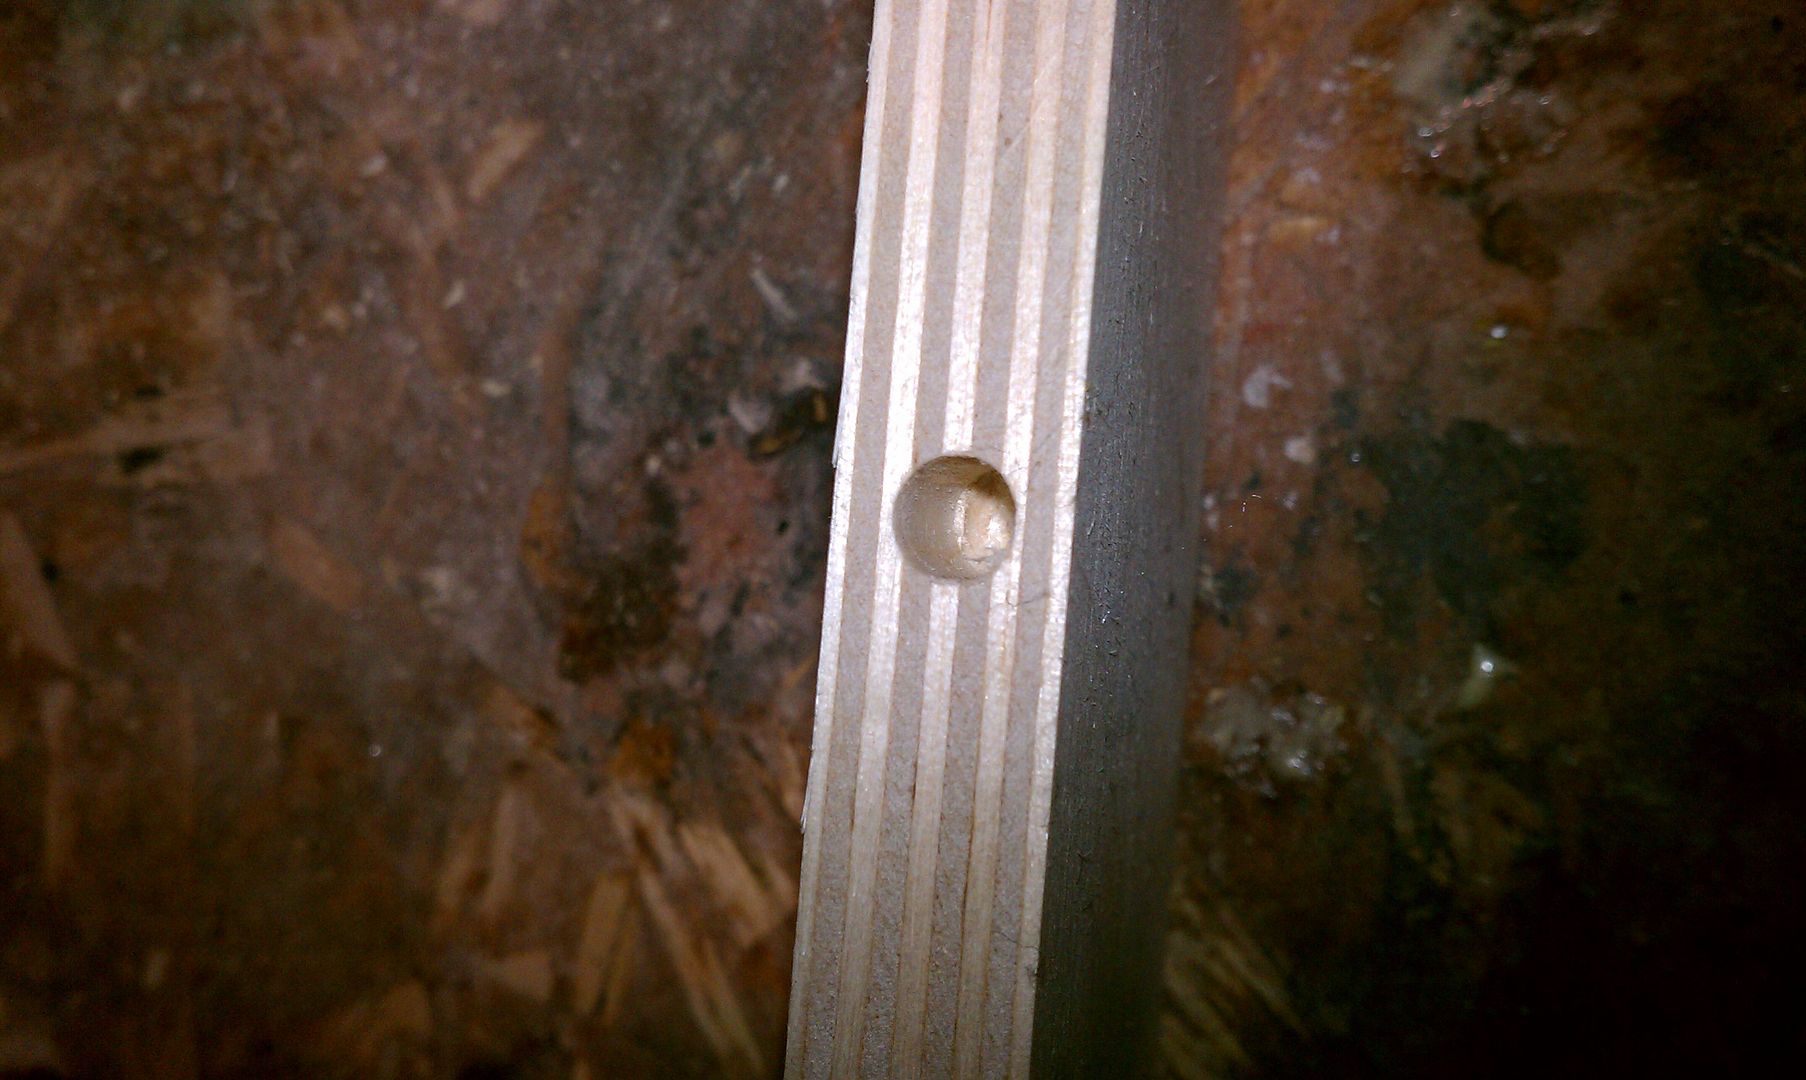
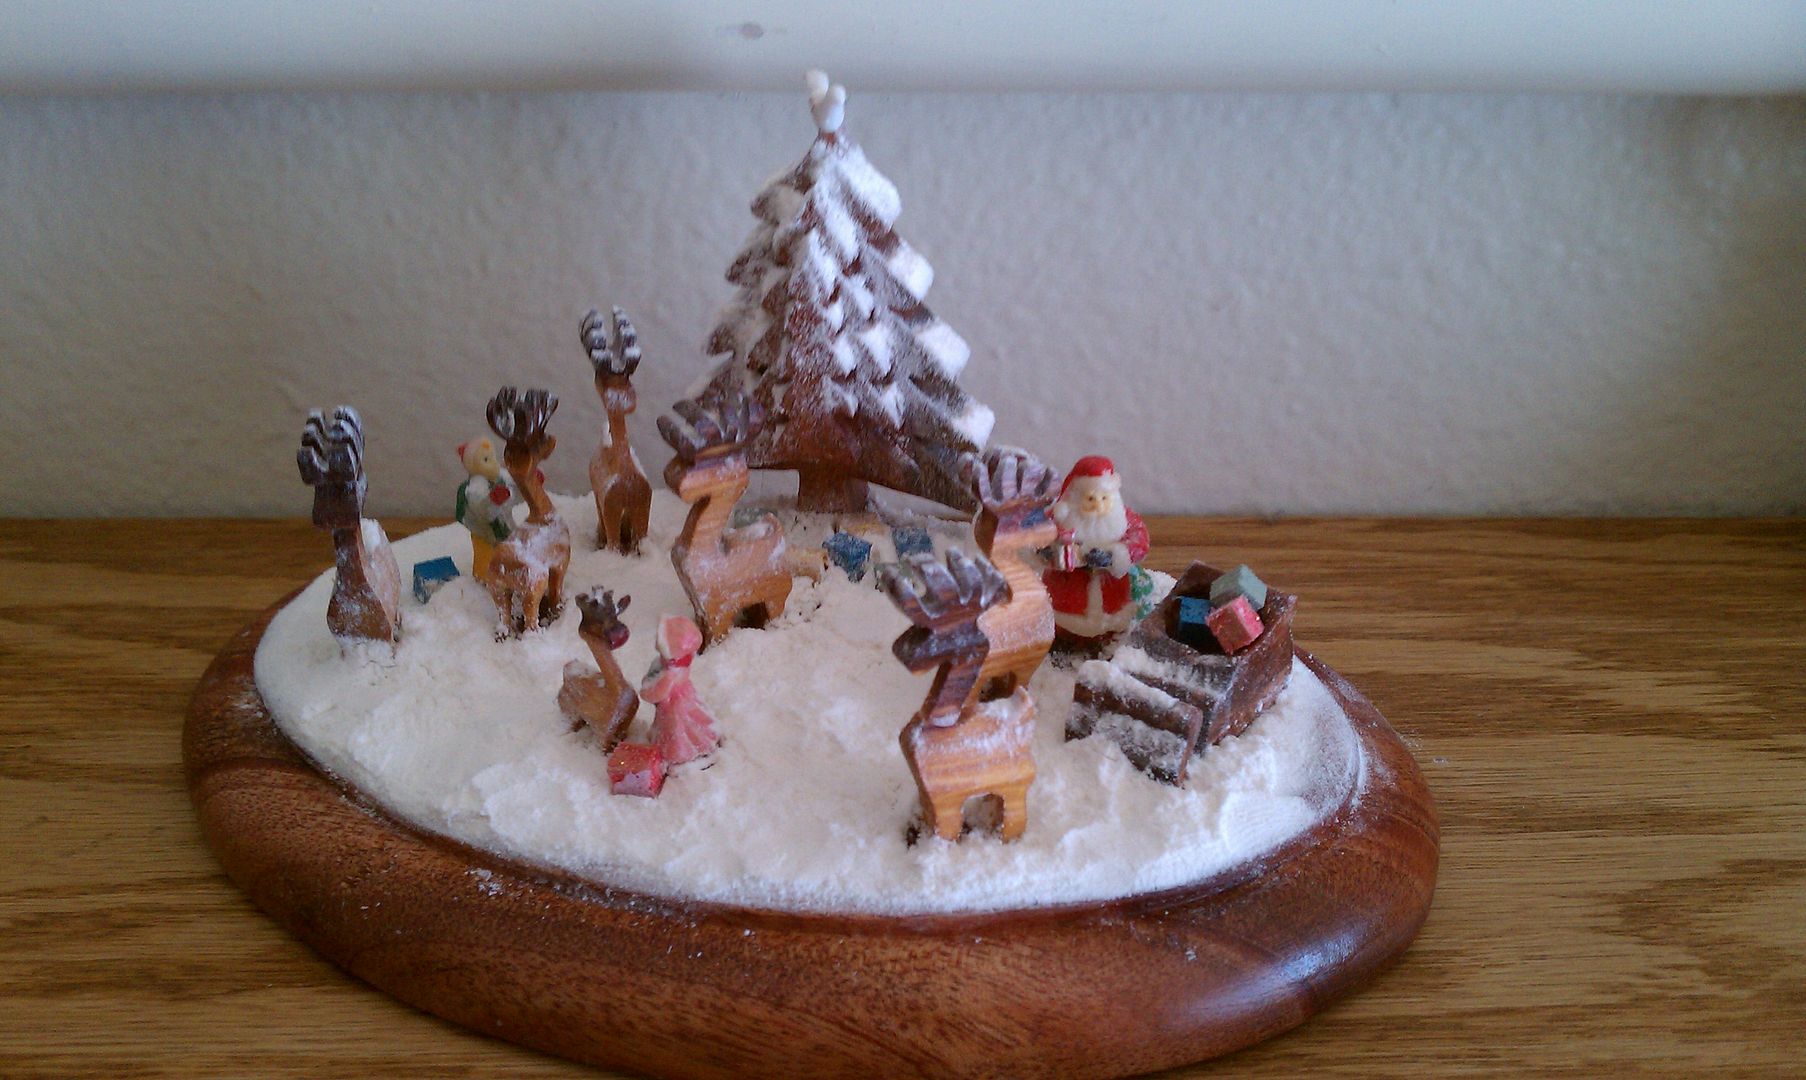
Dowel center finding jig and some Christmas woodworking ideas

Heres a quick little jig that Bill Wilson (the Cajone king) made for centering dowel holes on the edge of a board. Just two dowels and a hole all lined up. Place the dowels on each side of an edge and drill through the center hole. Voilà!


And since its gift-building season, Bill also sent over a picture of a project he built. The snow is flour.


*****
Heres another gift idea...a slit drum. Dave Hecker says his biggest woodworking challenge is getting wood into his basement...it has to go through the house to get there! Slit drums are fun projects.


*****

Kenneth Hockenberry posted this most incredible video over on Facebook today. (If youre not signed up the the Mere Mortals Facebook page, check it out. Lots of really cool discussions, sometimes about wood, sometimes about football on Sundays. Plus, if you arent there, we talk about you behind your back.) 

At any rate, there is so much that is cool about this video, I wont spoil anything before you watch.


Read More..

Local Meetups


Long-time friend of the show, Bill Akins, emailed me recently with a few pictures from a recent meetup at Highland Woodworking in Atlanta, GA. In the picture are Aaron Marshall, Chris Adkins, Todd Hyman, Rufus Carswell, Tray Akins and Bill Akins. What a happy-looking bunch! Although its hard not to have a smile on your face when your walking around Highland. Thanks to Chris for setting the meeting up!


Meetups like this one happen on occasion and I thought it would be nice to give folks an easy way to plan these things. So I just created a new room in the Wood Talk Online forum called “Meetups”. You can find it under the Community category. But here’s a direct link. So if you’re ever looking to plan a meetup, announce a meetup, or see if anyone else is interested in a meetup, that’s a great place to do it. And of course, let me know about it so I can help promote it. Don’t forget to take pictures and post them in the forum!


I hear Chris is planning another meetup in Atlanta very soon, so keep an eye out in the new Meetup Forum for any updates.


Click Here and Start WoodWorking

Read More..

Monday, March 3, 2014
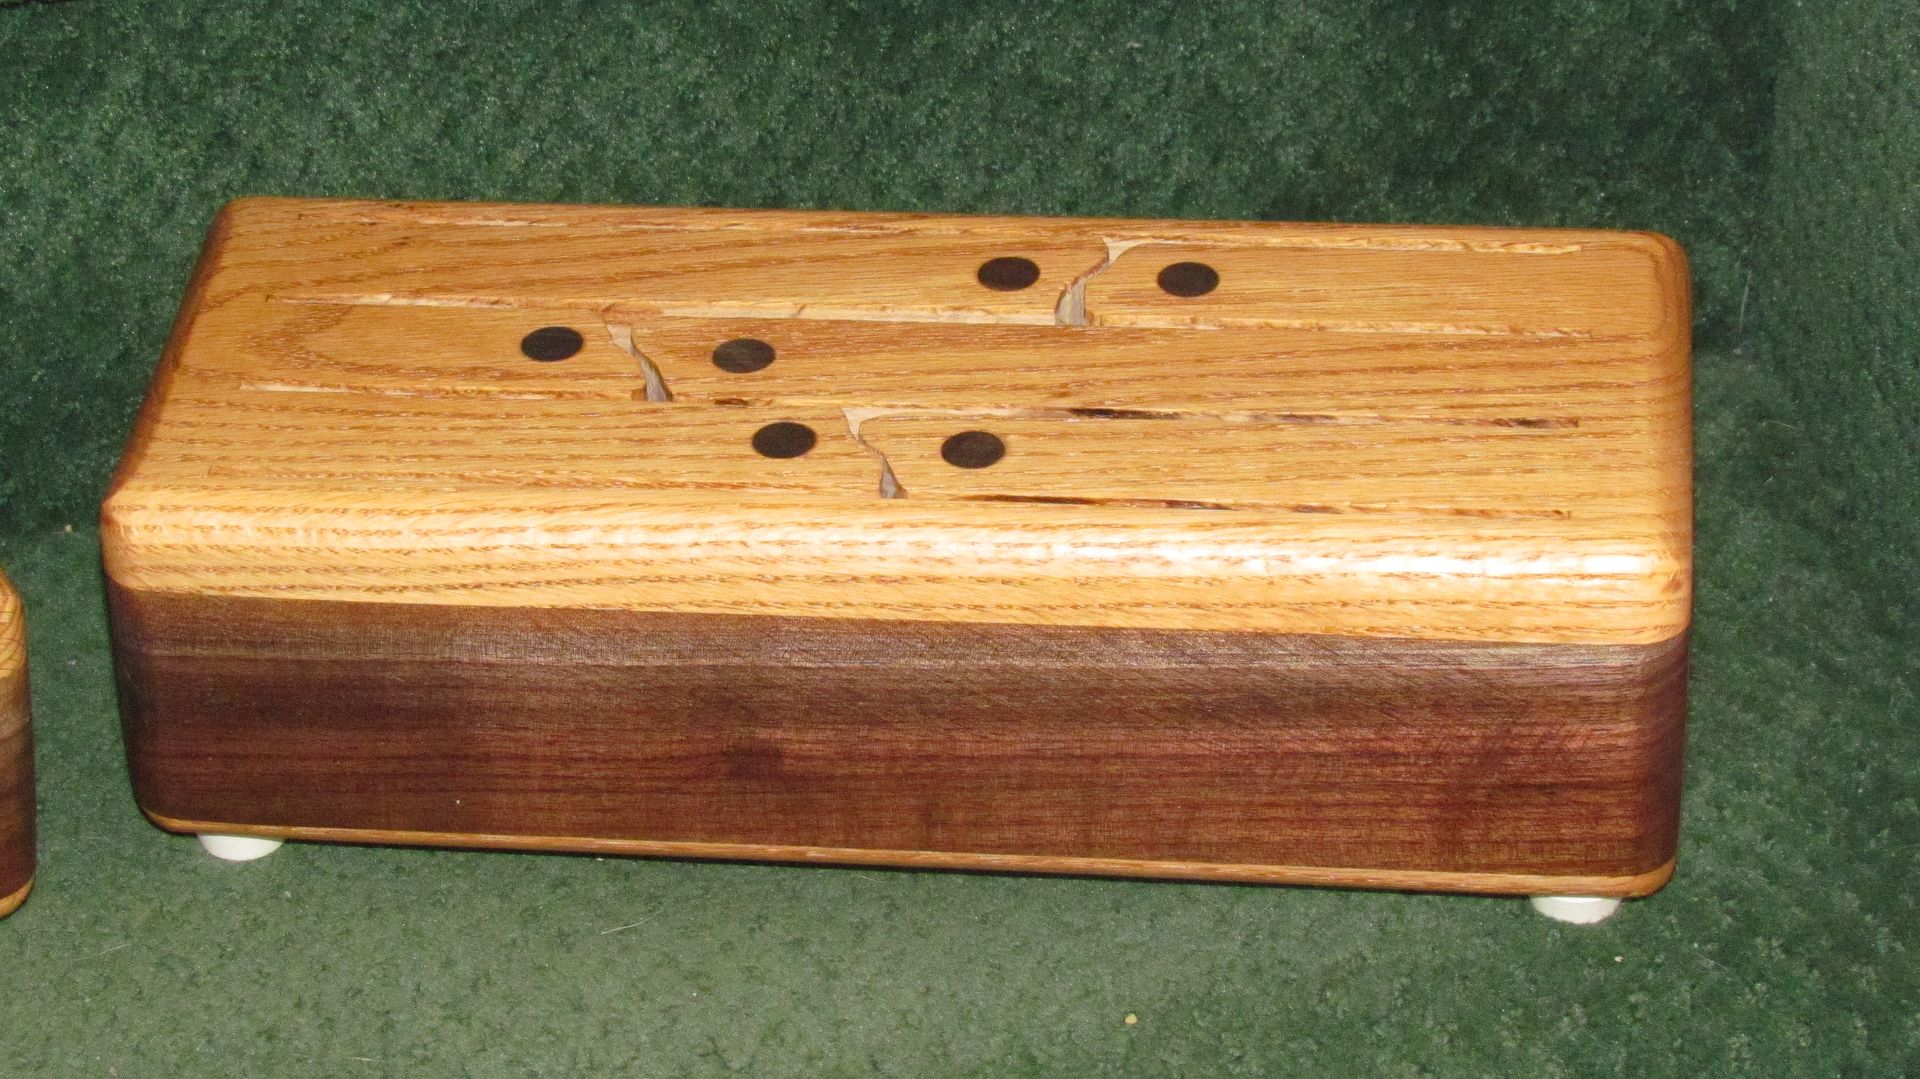
Still puzzling

If you are a Sketchup user (if you arent, you really should give it a try) heres a very detailed plan for the 10 Cent Labyrinth drawn up by Wood Chuck Bruce. Im always amazed at the work people are able to do with Sketchup. Thanks Bruce!

******

Speaking of puzzles, Timothy Sluder sent over this one. I am definitely going to make one of these. I think Ill need to actually build one before I can wrap my brain around how it works.


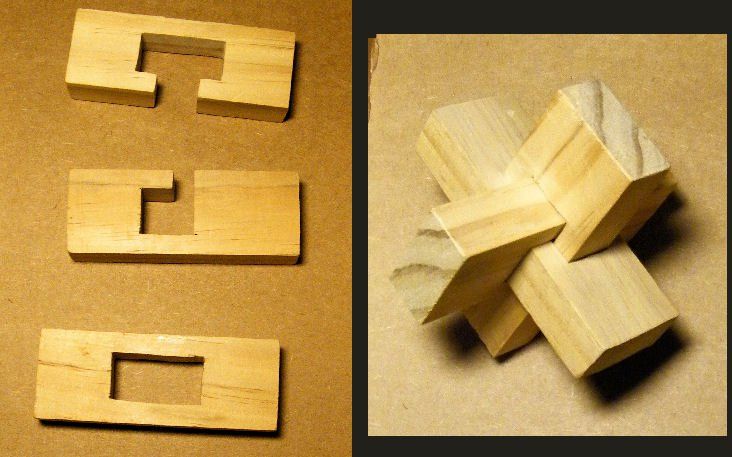
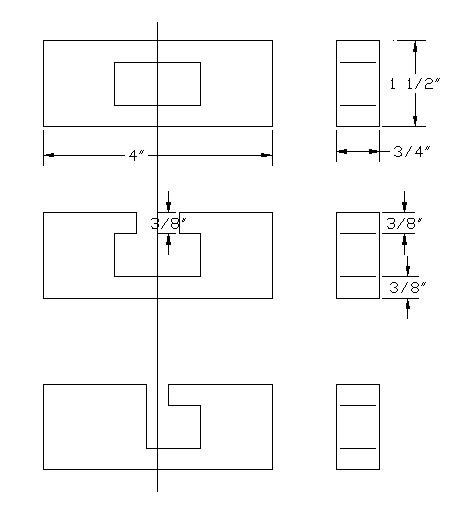
Not only that, heres a plan:


Thanks Tim. Puzzle on!
Read More..

Contest entries

There is one week left to enter the Mere Mortals video contest. Lots of time to submit your video!

Take a look at the entries so far. If you see any you like, leave them a comment and "like" their videos. Everyone likes a little feedback!

*****
Mere Minutes

Read More..

Sunday, March 2, 2014

Rabbet Joint Box

While making the simple bevelled wall board for my Ships Clocks a few days ago, it occurred to me that the very same design might make a good (albeit chunky) box lid. 

My stock (scaffold board Pine - of which I have a lot of it!) wood is around 1 1/2" thick, the simple design allows me to use what I have without having to waste most of the wood making it thinner. It also saves me a lot of sweat with a hand plane!

It also occurred to me that I have never made a simple Rabbet jointed box...

I completely forgot to take any pictures during the build as things progressed pretty quickly. A rough description of the steps I took are below:

Box Carcass
  • Cut four pieces (2 long , 2 short) of cheap (pre-planed) Pine to length on the bench hook.
  • Shoot them to exact lengths with square ends on the shooting board.
  • Mark and cut the shoulder line of each rabbet on the short sides of the two long boards (the front and back of the box) again using the bench hook - 2 rabbets per long board.
  • To form the actual rabbets, I first tried using my small shoulder plane with a wooden baton clamped in place to keep me straight, but this proved to be quite slow. For the three remaining rabbets, I simple used my dovetail saw to cut down the end grain (much like sawing a tenon), finally cleaning the joint up with the shoulder plane. In retrospect, I should have (been brave) tried to remove the waste with a chisel which would probably been even faster than sawing.
  • Use a plough plane to cut 1/4" grooves in the bottom of the boards for the base to fit into.
  • Cut a thin plywood board to size for the box bottom.
  • Glue the carcass together.
  • Plane the edges and joints flush and generally tidy it up.

The Lid
  • Approximately cut to length a piece of rough scaffold board.
  • Assess the board for grain direction and use winding sticks to check the wind and straightness of the board. Pencil in notes on the board as to what work is likely to be required and where.
  • Plane one face flat using my no#6 and mark it as a reference.
  • Hand plane the adjacent long edge straight and at 90 degrees to the first face and mark it.
  • Use a marking gauge to mark all around the edges of the board to get it to uniform thickness again using the no#6 to remove wood fast.
  •  Use a marking gauge to mark the second long edge parallel to the first.
  • Precision cut the board to the required length and ensure it is square.
  • Mark bevel lines all around the board using a marking gauge. Used my no#4 plane to create the bevels, being careful to finish the short end grain sides first.
  • Fit small brass hinges and apply some wax finish...
While the box does look rather like a coffin for a small dog or a cat, it was very enjoyable to make with most of the project being completed in a single day. Rabbet jointed boxes come together pretty fast! Not as nice looking or as strong as a dovetailed box, but I did learn from it and at this stage thats the most important aspect for me.


More simple projects to follow ...


Read More..

The Easiest Ever Way To Fix Stained Drawers


This past Sunday I spent like most Sundays.

Doing laundry. Then, doing more laundry. Oh, and also ironing. Lets not forget that.

However, in between all my domestic responsibities, I was also able to fit in one of the many tasks on my never ending to do list. I was able to finish lining the drawers of a furntiture piece I recently completed. Yay! Ok, this was not really an exciting task, but I got it done.

A couple of weeks ago, I finished a dresser/buffet in a finish I call Two-Toned Glam. The piece came out beautifully in the end, but it had given me little fits here and there. Just little things. For intstance, I talked in an earlier post about having to deal with water marks that had popped up.

Another minor, but nevertheless so very annoying, problem with this piece was a drawer which had a stain. From time to time, I will have a great piece to refinish that may have stains or marks inside the drawers. And, because most of my pieces I sell at my Etsy shop, I want to be sure they go to my customers in good shape. Sometimes, I can clean away marks. Other times, I may need to sand them away. On this piece, however, the stain was too deep and superficial sanding would not work.


So, my favorite, and by far the easiest, fix for imperfect drawers is lining them with adhesive cork.


This brand I purchase right at Home Depot.
It gives a clean and natural look and for drawers that could see a lot of wear, it is very durable. It also "naturally resists mold and mildew, as well as, cushions and protects"...that there is right off the label!

First, I measure the length and width of the drawer. Oh, and take out the drawer to make it easier...which I, of course, did not yet do in this picture.


Then, unroll your cork adhesive onto a flat surface and mark off the drawer measurements on the back grid and cut along the lines.


Next, peel back one corner of the cut liner and lay the adhesive side down in your selected drawer corner.


Once your corner is down, slowly pull the white paper off the adhesive back, working from the first corner. At the same time you are pulling the white paper off, begin pressing down the adhesive side, smoothing as you go.


Here is my drawer "after" with the cork liner. It is a downright pretty inside of a drawer...dont you think?


Read More..

A Corner in the Living Room


 For a while now Ive been gradually working on a corner in our living room.  You may remember the shelves we recently hung to give some structure to a large bare wall.  Adjacent to the wall with the shelves was yet another space I needed to fill. 

 Our living room updates have included a new ceiling, new trim, new ceiling light fixture, new drapery and fresh paint.  Ive tried to keep the rest of the updates minimal and inexpensive.  With that in mind, I needed to make our existing furniture work.  After finding a furniture arrangement that I liked, I brought our originally black console table over to this wall.

BEFORE:


 I knew the right piece to hang above the table would be a mirror, so I took a trip to our local antique mall to take a look.  I found this mirror for $20.  It was heavy, obviously old with a solid wood frame and back.  I knew I would have to paint the frame so that it stood out against the wood walls, but after thinking about it for a few days, I realized it would be perfect and went back to buy it. 


 I first painted a light coat of BM Titanium (the same gray I used for the shelves), then a light coat of Annie Sloan Chalk Paint Coco, lightly sanded and finished with clear ASCP wax.  I was so pleased with how it turned out and was thrilled that my husband had to agree (especially since he tried to talk me out of buying it - smile).  

BEFORE:


The following week I went to work on our generic console table, which we purchased as newlyweds.


 The truth is... I painted too many coats on this piece to count.  I just could not get it to look right!  Finally I ended up painting BM Titanium over ASCP Coco, and finished with both ASCP dark wax and ASCP clear wax. 


 The neutral colors really pop against the wood walls and hopefully help to create a look that is soothing and cohesive.  You may have heard me mention before that the wood walls are original to our home... as hard as it has been for me to decorate this room, I really wanted to try and embrace that rustic element.


 Originally I had planned on buying a couple lamps to set on either side of the mirror, but Justus had the suggestion of buying oil lamps, and I was instantly smitten with the idea.  In our old house, we dont have many outlets and its also nice to have a source of light when the power goes out.  I bought these nearly identical lamps at our local antique store.  All we had to do was add lamp oil - fun!


 Slowly the corner was coming together.  Then last week my dad came over and brought me some antlers he had found on their farm.  I knew immediately they would complete the look I was going for and hung them above the mirror. 


 In actuality, our sofa sits in front of the console table.  Weve had this red sofa for nearly nine years (another newlywed purchase) and will likely have it for another nine (smile), so that was certainly another reason for opting to keep the background decor simple and neutral.  

Sometimes I feel like there is still so much to be done in our home, but tonight when I happened across "before" photos of our living room and our entire house, it was so rewarding to see that we actually have accomplished a lot.  Yes, there are still many improvements that need to be made, but I feel like I need to be more thankful for what we do have and recognize that it doesnt all happen overnight.  

With that being said, were looking forward to starting on some outdoor projects tomorrow we hope to accomplish before spring, and one of those is a chicken coop!  Today was rainy and overcast (hence the bad photos), but if we see sunny skies, well be getting started.  

Hope you have a wonderful weekend!

Sharing at Miss Mustard Seed
Read More..

Saturday, March 1, 2014

Living Room Shelves


Hi there!  I hope you had a nice weekend... its hard to believe its almost over.  

We have a large wall in our living room that Ive never known exactly what to do with.  With our recent living room updates, Ive been trying to do a little "freshening" in the room.  Recently it dawned on me that some shelves might provide a nice contrast and also be an inexpensive way to add some interest. 


 After suggesting the idea to my husband, he so sweetly agreed (let me tell you, I am thankful to have such a handy husband that doesnt mind all my crazy ideas) and a trip to Lowes we made.  We picked up four of these wooden shelf support brackets (two for each shelf).


 And we also bought two 48" pine stair treads to use for the actual shelves.  Once we brought them home, I primed them and then painted two coats of Titanium by Benjamin Moore, which is my all time favorite gray. Then Justus screwed them into the wall studs.  Once he finished, I filled in and painted the screw holes.  It was such a simple project.  Overall, for two shelves, the cost was about $50 (not including the paint and primer, but I already had both on hand). 


 I love how they turned out and how they look on the bare wall but I did struggle for over a week with what to display on the shelves!  I wanted a neutral look but the vignette also needed to stand out from the wall.  In the end, this is what I came up with, although I make no promises that it will not change in the future (smile).  


   This weekend Justus finished all the trim work in the living room, so now I just need to paint it ... and dare I say... we will be finished!  (Please tell me that you too have projects that end up taking you 4 months to complete!)  

Do you see the stained corner trim in the above picture?  The previous owners had painted the corner trim white.  Once we raised the ceiling, the trim needed to be replaced anyway, so we opted to stain the new trim to match the walls.  Its a change somebody else probably would not notice, but we love how it creates a more cohesive look.  (Soon Ill tell you about the stain we used... it was amazing!) 


 The natural wood bead board walls in our living room are original and when I first walked into this room, my first thought was paint... but since then, Ive not only came to respect the history of the walls, but love them.  Somehow over the span of eighty years, they were never painted and still remain in superb condition. So even though decorating has been a struggle for me in this room and wood in its natural state may not be popular, I just cant bear to change their originality.  Ive grown to love how the sun gives the wood a golden hue when it goes down in the evening and how the smell of wood becomes strong when it rains.  

I guess you could say it just feels like home


P.S.  Look what Justus found in the garden today!

Read More..